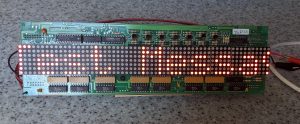
I came across someone selling parts from a large LED sign on ebay which by doing some research came from a Data Display LED board originally used for movie name, showtimes and price information display in a cinema lobby. Their part number could be DL110 as that’s the only number I can find on the board. The module I got consists of 12 5×7 LED matrix modules with the shift registers and row driver circuitry so it can be directly interfaced to a microcontroller. Looking at the date codes on the IC’s this thing dates from 1997 / 1998 so is over 20 years old and certainly not something you can buy anymore. Even then it would be a custom part. This was really bought for something to mess around with whilst in lockdown and I do have a possible use for it as a sign to put in the rear window of a car to inform other road users of their driving skills (or lack of)… don’t hog the middle lane you dumbass lol. 🙂
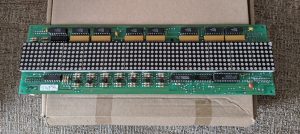
 I obviously didn’t have a datasheet but reverse engineering the module by obtaining datasheets for the chips used on the module was fairly easy. The data comes in via a 14 pin connector and goes through buffers then to the row and column drivers. There is another connector for daisy chaining to the next module. I found that the 7 row drive signals come in then go through a 74HC373 latch which was being used as a buffer as it’s relevant enable pins where permanently tied high / low as required. The output enable / latch, clock and data are buffered by AND gates with the two AND inputs tied together. Seems strange how they did this as a schmitt trigger would have sufficed instead. The row drive signals then go on to a mosfet / power transistor driver chip and then finally to the row drive BD436 transistors whilst the rest of the signals go on to the column shift registers.
On the off chance that you are reading this and have bought one of the other modules from the ebay seller I will list the pin connections below. The pinout is looking at the front of the board with the input connector at the top left with the pin bottoms visible. I’ve numbered it so that pin 1 is lowest left and 14 is upper left so that it follows the same pin numbering of the IC’s on the board.
The connections are:-
1= GND, 2= column data, 3= 0 to -9V (brightness, works just fine tied to GND) 4= clock signal return to logic, not used here, 5= no connection, 6= column OE / latch, 7= column clock, 8 to 14 = row address pin 8 = D6, 14 = D0. Power is supplied by a 2 pin connector on the right hand side of the board. This must be regulated 5V at at least 3 amps.
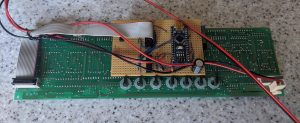
 I haven’t done a schematic but I will try and describe what I did to get this to work. The original code used shiftout to drive the columns and direct addressing for the row scanning using 7 arduino pins. I modified it so that the column input signals are driven by the Arduino’s SPI interface ( pins 10, 11 & 13) whilst I used a 74HC595 as a row address selector with the relevant address line being sent to the ‘595 serially on pins 2,3 & 7. The 74HC595’s output pins used are D1-D7 with D0 unused, this is because the code was originally designed for 8×8 modules where I’m using 5×7 instead. I used shiftout to select the row addresses as speed isn’t really required here. Using SPI for columns improved the brightness and the flickering whilst scrolling. Also note that the 74HC595 requires that it’s OE pin is connected to GND and it’s MR (SRCLR) pin to 5V. Depending on what brand of 74HC595 chip you buy each manufacturer calls the input pins something different. E.g STCP (strobe clock pulse) and SER (serial) so you would have to check the datasheets accordingly. If your characters appear upside down then you have connections D1 through D7 reversed.
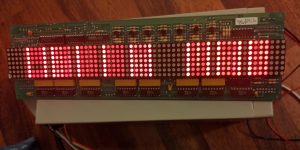 All that was required was to load the firmware and test. I did come across one problem where the row data has to have it’s logic inverted, in other words to turn on a row you send logic 0 and to turn it off you send logic 1. This is because the row drivers use PNP transistors. This is easily done in the code by adding the operand ^0xFF to swap any logic 1 with 0 and vice versa. The image on the right shows what the display will look like if the row address isn’t inverted. I further modified the test code to add a serial menu where you can upload a message to the display and it is stored in EEPROM. I also left space on the PCB to add further components such as an RTC module if I decided to use this project for something else.
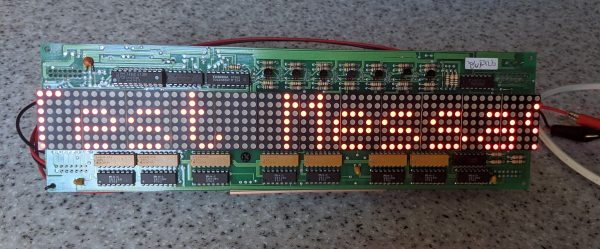
On a final note, in the photos the LED modules appear to be orange. In fact they are bright red and the orange look is just how they appear on my camera. Also it’s worth mentioning this needs 5V at 3.5A if all LED’s are lit however when scrolling a message the average current consumption is 600mA. These are old LED modules and are not very power efficient. The MIC5821 driver shift registers do get fairly warm. I’ve done a brief youtube video below if you want to take a look.
Ebay auction these were bought from
The completed project:-
Great writeup. I also bought some from this seller!
If only you had published this earlier… I went through the same process after finding no info on these panels. Interestingly mine is yellow-green, not red. Your red ones look much brighter than mine.
See my write-up on github: https://github.com/Interoth/DL110-LED-matrix-sign
I was also curious why they used AND gates as buffers, I guess the chip must have been cheap/fast. Have you been able to figure if anything is done with the remaining bits on the last shift register?
I think the sign originally had red modules at one side and green at the other; it would have been arranged in two maybe more columns of these modules with a total of 40 modules or so per sign. It would have been used to display the movie name, show times and screen number.
The last shift register 74HC164 I’m not sure why that was used as it’s between the end of the shift register chain and the output connector to the next module. The logic 2000 controller board the ebay seller is advertising is an earlier revision of the control board used for LED bookie boards at horse racing events (UK and Ireland only) I repair these products as a day job. They are all made by Data Display (now Daktronics) and despite been sold up to 3 years ago it is a very old design dating back to the early 1990’s. In fact many of the chips have 1990’s date codes on brand new logic boards. I guess they must have had a stock of new, aged stock chips.
The way the firmware or hardware on the logic 2000 board works is probably why they fitted the extra shift register. The LED bookie boards don’t have this and the data sent to the panels is slightly different. The row scan outputs are in binary coded decimal instead of having individual lines for each of the LED rows. They are decoded on the LED panels even though the logic board has 7 individual row select lines; just last three are connected to the display panel. The ribbon cable even has unused conductors so why they designed it that way is a mystery as they are using more components than they needed to.
The boards are simply configured and options added / removed by changing the firmware ROM and setting the jumpers / DIP switches. There are lots of unused connectors and chips when used for our application.
I’ve managed to partially reverse engineer the logic 2000 PCB so we can design our own replacement logic board when our stock of spare parts run out. The new design uses an C8051F340 with two 74HC04 as buffers and to change the logic level from 3.3V to 5V. That’s still under testing but works fine so far. Unfortunately it won’t be shown on this blog as it is for work rather than for me personally and not being released as open source. It contains code that is unique to the company I work for and our in house software.
As for the brightness the drivers need up to -9V to control brightness but that depends on the duty cycle as well. I’ve just tied the -9V to ground and it’s bright enough. The modules are very old and not very efficient but brightness could be increased by adjusting the duty cycle or perhaps try applying a negative voltage to the -Vee on the power shift registers. I noticed that using SPI to drive the display rather than shiftout increased the brightness a lot. Also getting rid of the Arduino digitalwrite functions and using direct port / pin manipulation helps as well. Furthermore the MIC5821 shift registers can’t handle higher SPI data rates like the 74HC595 can. Above 4Mhz it starts to corrupt.
I’ll check out your Github link.
Interesting history. Yeah I was able to get the brightness up a decent amount by getting the row data send time down, which was easier with the faster clock of the pi.
Kind of wish they had actually used the latches on the shift registers. Would be brighter if the previous line could be illuminated until the data had finished sending. I guess it was just fine with the current setup.
I’ll have to try the -9v line. Inconvenient to generate though.
I thought about modifying the board so that the latch pin was used instead of the output enable if it wasn’t satisfactory but it works good enough as-is. As a matter of interest the shift registers on the bookmaker LED boards that use the same logic 2000 control board have the OE tied to 5V and do use the latch.
Good evening,
i would like trying this arduino solution on DL216 modules, please, i need to know if the way of driving module is the same way as for DL110 ???
Anf i have some Logic 2000 boards but i am not able to send data over RS485 either RS232 (with SDS software), please do you have any details on logic 2000 jumpers configurations ???
Thanks for help,
Regards
Hi the logic 2000 is a universal controller board used in several data display signs, the firmware matters as well as the jumper settings. Unfortunately there is no technical information on these units whatsoever and I had to resort to reverse engineering. The DL216 modules I do not have a schematic for but you may be able to tell how it is driven by seeing how many data wires there are. There will be a serial data (SPI) for the column address and the rows will either be 7 individual row select lines or just three in binary coded decimal. That’s the two variants I have seen. If there’s only 6 data wires it’s likely SPI for columns and BCD for row select, if there’s 10 or more then row address is individually selected.
Do you have a photo of the DL216 display modules that show the IC part numbers?
Also if the logic 2000 board you have does not have the right firmware it won’t do anything using the CDS software. The bookmaker boards we have that use those controllers use a protocol that consists of a start code followed by line address then the data to be displayed then an end code. All are sent in hex. The start and end codes are STX and ETX in the ascii table. So for example to display something on line 2 the data to be sent to the sign would be something like 0x02(STX) 0x32(2) character data in hex 0x03(ETX) without the spaces. To make a character flash you send the character + 128 so to flash an uppercase A you would send 0xc1 which is 0x41 (ascii A) + 128 in hex = 0xc1.
You could try sending data to it in a terminal emulator such as realterm to see what it does. I’d suggest starting the message with 0x02 followed by 0x00 then your data in hex character by character and ending the message with 0x03. Realterm is pretty good as you can send an entire string at once in hex.
Baud rate on the bookie boards is 9600, 8 data bits, one stop bit. They dont use any flow control.
Great read, I came across this as I have a message board that uses the Logic 2001 pcb, I’m thinking to perhaps redo it with Arduino, however as its all working id like to get hold of the software to control it, I believe its called ProdnSDS & CinSDS32 although I have had no luck locating it, should anyone have it Id be very grateful – I assume the brightness is controllable for the DL110NS LED boards via the logic 2001 as mines a bit too bright
Peter
I’ve also been interested in getting hold of the software to control these controller cards. They are used in bookmaker boards but the firmware is different and specific to the bespoke software we sell to customers at my workplace.
The boards use a protocol that consists of a start code followed by line address then the data to be displayed then an end code. All are sent in hex. The start and end codes are STX and ETX in the ascii table. So for example to display something on line 2 the data to be sent to the sign would be something like 0x02(STX) 0x32(2) character data in hex 0x03(ETX) without the spaces. To make a character flash you send the character + 128 so to flash an uppercase A you would send 0xc1 which is 0x41 (ascii A) + 128 in hex = 0xc1.
Once I return to work when furlough ends I will try and get hold of the protocol document; I presume it will be the same for the cinema lobby display boards.
I assume the brightness is controlled by the update frequency PWM
is that something that can be sent in the command string?
I’d assume so but on the LED bookmaker display boards the brightness was controlled by a photocell that simply altered brightness according to ambient light. The command set we have does not have any facility to adjust the brightness through software although the cinema display may do.
FYI. A really nifty way to drive 5V logic from 3.3V logic (as in this case when driving the 5V panel from a 3.3V Raspberry PI) is to use 74HCT logic devices. These have TTL-compatible inputs (>2V = logic high), meaning they are perfectly compatible with 3.3V logic – of course, they must be powered from the 5V supply derived from the panel, not the 3.3V supply.
I have driven a different display module from a Raspberry PI in this manner, and it works really well:
https://www.flickr.com/photos/51699638@N06/14073056022/in/album-72157644439264251/
https://www.flickr.com/photos/51699638@N06/13889595187/in/album-72157644439264251/
Hi yeah, I used 74HCT buffers for converting 3.3V logic to 5V on the ESP8266. I have built a couple of YouTube stats counters with one using the MAX7219 which requires above 3.5V for a logic 1. The other uses ICM7228’s which only need a voltage above 2V for a logic 1 and below 0.5V for a 0.
Nice looking project BTW. I found the Chinese clone MAX7219’s work on 3.3V but the genuine Maxim ones don’t. I used a logic level translator just to be sure. On the ones I’m going to sell I’d use genuine Maxim chips.