This month’s project; a YouTube statistics counter I made from spare parts I had laying around and also a good opportunity to play around with the ESP8266 module which is a WiFi chip that contains an 80Mhz 32bit CPU with some flash space free to run some additional code on. It has a USB bootloader in ROM to enable you to install custom programs which can be written in lua, python or C++ to increase it’s functionality. It’s basically a high speed Arduino as it can be programmed with the Arduino IDE amongst others. The Arduino IDE is what I used as I was already familiar with that and C++. I have a crap ton of spare 7 segment LED displays so I thought I’d put some of them to use and designed a YouTube stats counter that shows your current subscriber count and views to your YouTube page.
Now YouTube made some changes to how the subscriber counts are displayed last year and now instead of it showing you the exact number of subscribers you have they are now approximated and rounded down on a sliding scale. For example subscriber counts below 999 will show exact numbers and above 1000 they are rounded to the lowest 10 e.g 1234 subscribers will show 1230 or 1.23K depending on where it is displayed. This counter gets it’s statistics via the YouTube API which only returns numbers so in this case it would return 1230. So I decided that I would settle for a 4 digit display for subscribers and 8 digits for views. It is ideal for smaller channels with less than 10,000 subscribers who want to keep an eye on their channel growing. When you are just starting every new subscriber counts and this will show it in relative real time; the counts are updated every 5 mins.
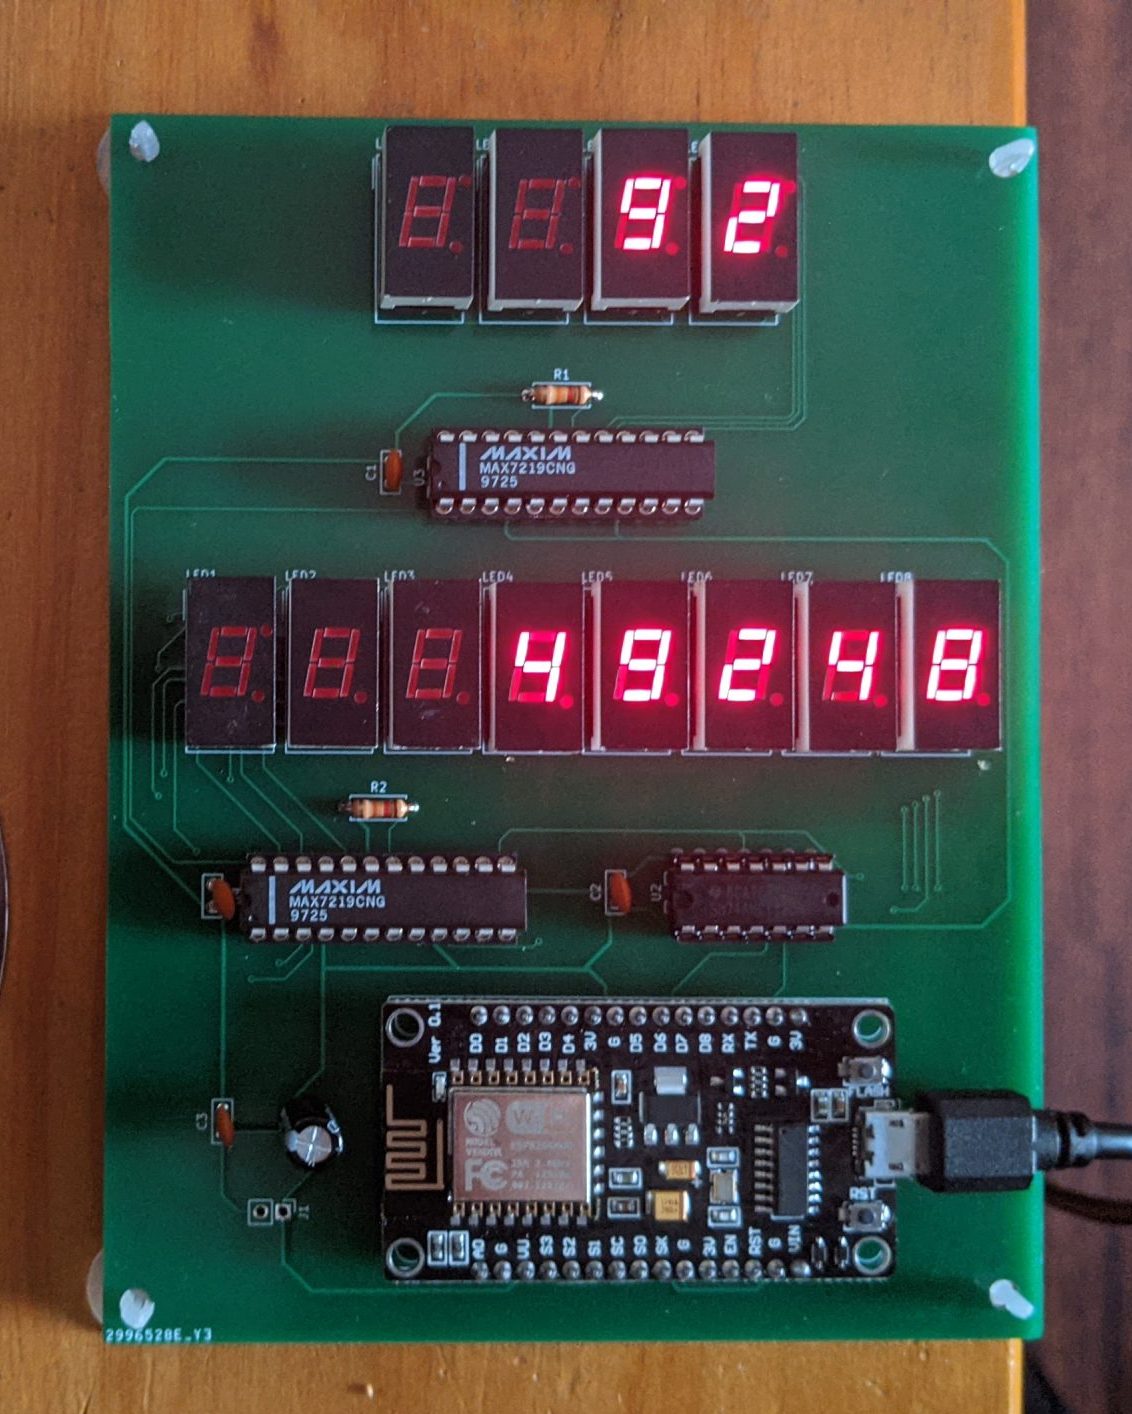
As you can see I decided to make my own PCB as I didn’t want to assemble it on prototype board and connect loads of wires as that would just take too much time and it’s a tedious process. You can get boards made now for very cheap; I used JLCPCB and it only cost $17 including shipping which even with the current restrictions was very quick. The boards were manufactured and sent to me within 2 weeks. Not bad.
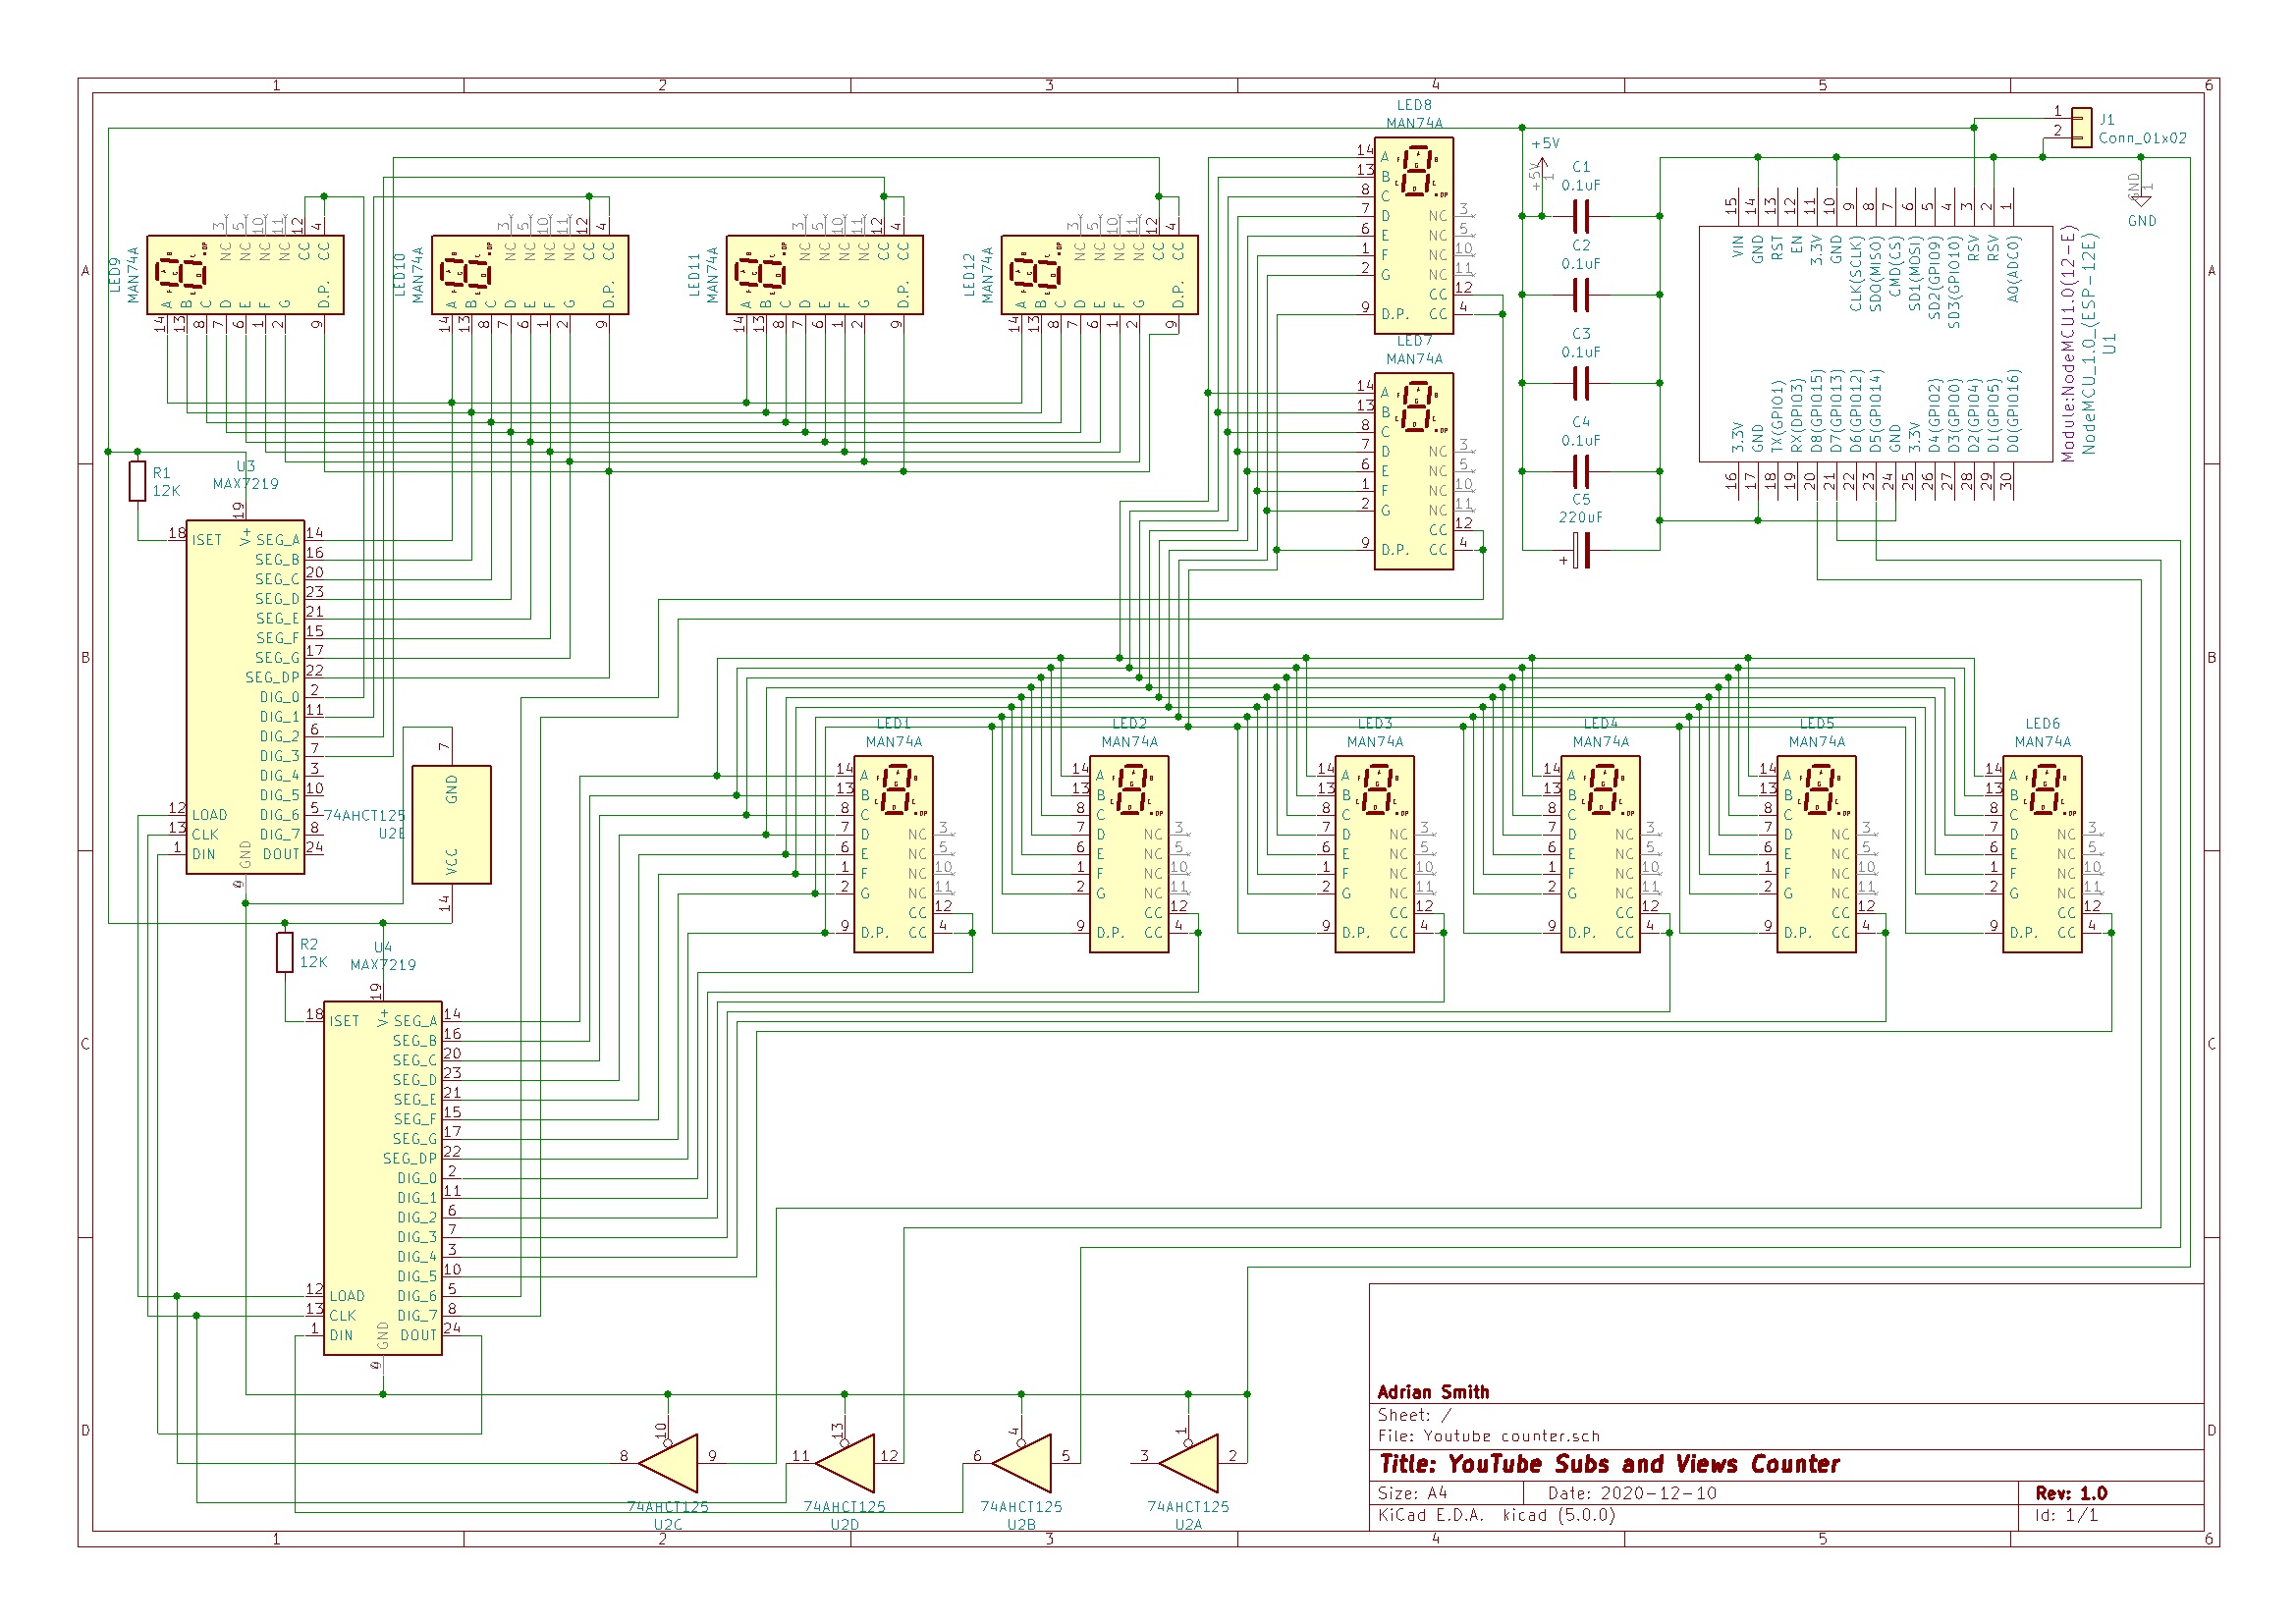
The circuit consists of an NodeMCU ESP8266-12E module, 2 MAX7219 chips and a 74ACHT125 buffer which serves to convert the 3.3V logic signals of the 8266 into the 5V the MAX7219 requires. Some vintage Fairchild MAN74A 7 segment LED displays finish the design for a retro look. I plan to fit it into a photo frame or perspex display case to finish the counter. Power is supplied via USB although I have provided PCB pads for a 5 volt standalone power supply.
I do have some spare blank unpopulated PCB’s for this project. Please let me know in the comments below if you would like one. They would be sold via eBay UK and I will list one as needed. Link to buy a completed PCB with orange LED displays here.
Code and all other files can be downloaded here Please click on read more for setup instructions.
Updated firmware version 1.02 (fixed HELP error not displaying if can’t connect to WiFi network.
This project is being released under the creative commons non commercial licence. You are free to download / use / modify any of the project for your personal use but must give me credit in any of your modifications if you re-release it on the internet. You may not use this project for commercial purposes i.e. make copies and sell them for profit.
###Setup instructions###
To get this project to work though you will need to obtain an API key from google. A very comprehensive guide to this can be found here https://www.slickremix.com/docs/get-api-key-for-youtube/ and the developer account you will need to create is free of charge. Once you have done this and built the project, flashed the firmware etc the counter will need to be set up.
First of all it will need to be connected to WiFi. I used the wifimanager library which automatically puts the counter into access point mode if WiFi isn’t configured or it can’t connect to the configured network. This creates an access point with SSID “YTcounterAP” and the default IP address is 192.168.4.1. To connect grab a smartphone and disconnect it from any WiFi network it is already connected to then scan for networks. Select YTcounterAP and when it asks you that you need to sign into the network enter the password “password” into the box; this will differ depending on what phone OS you are using. If you are using a laptop just use password for the wifi network. If on a phone a browser page will automatically open; on a laptop you will have to open it yourself. It’s formatted for phone screens so I’d recommend using a smartphone instead.
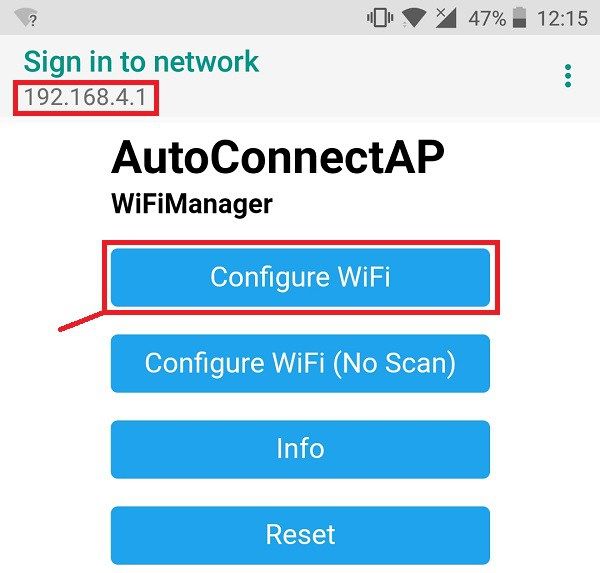
Once you have the webpage open (or manually gone to 192.168.4.1) you will be presented with a couple of buttons “configure WiFi” and “configure WiFi (no scan)” which will allow you to connect the counter to your network. Clicking the first option will make the counter scan for networks, second will require you to manually enter your router’s SSID and key / password. Assuming you chose the first option click on your router’s network name and fill in it’s key / passphrase / password. The counter will reboot and attempt to connect to the new network and the newly created YTcounterAP network will disconnect. You will be able to tell because your phone will disconnect and reconnect to the previous WiFi network it was connected to. The wifimanager github page is at https://github.com/tzapu/WiFiManager with sample screenshots and instructions.
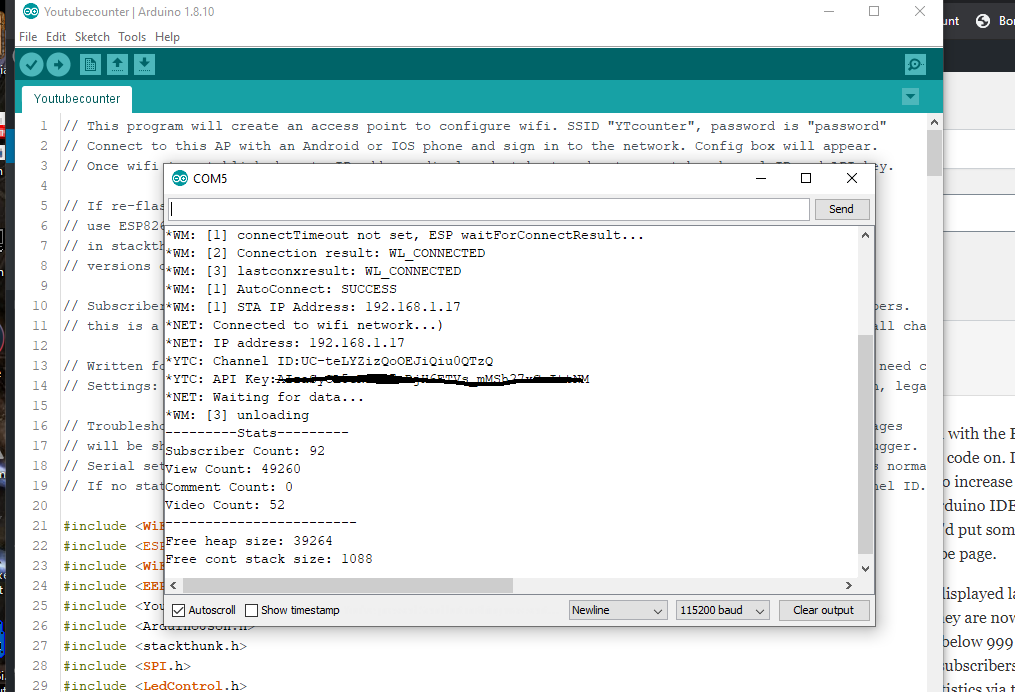
The next step is to enter your API key and channel ID so the counter can get the statistics for your channel. First of all you will need to determine the IP address the counter is using. You can do this via the Arduino serial window and observing the boot diagnostic messages sent over the serial port. You can also use a terminal emulator program such as RealTerm set to 115000 baud, 8 data bits and one stop bit to the appropriate serial port.
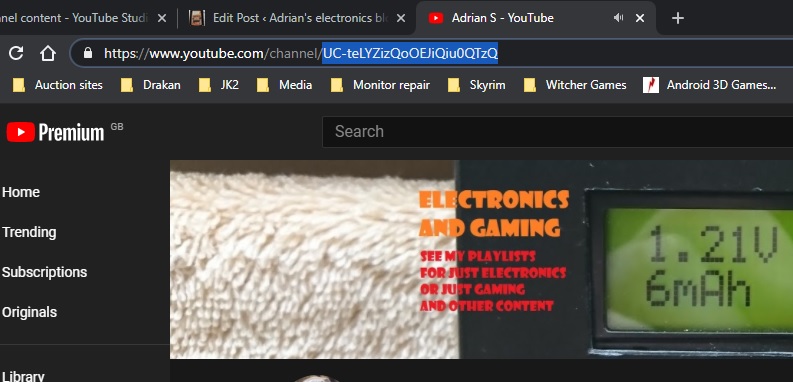
Once you have determined the IP address open a web browser and put the IP address into the address bar and the config page will open. Enter your Youtube details into the boxes provided and click submit. Your YouTube channel ID is the numbers & letters after the https://www.youtube.com/channel/ which usually starts with UC. Once this has been entered reboot your counter and stats will hopefully be displayed. If not check the serial monitor for any error messages as it will show standard HTTP codes as errors for example 403 is likely because your API key is incorrect or not activated.
Please comment below if you have any trouble getting it working and I will do my best to help.
###Example screenshots###

###Youtube video###

